Lenthening A Sweater
Well, I have been accused of being brave for just cutting off my ribbing (no, just lazy) and have been asked for a tutorial. I have always wanted to do a tutorial, I'm kind of a geek that way. So here it is.  Here lies my Gigi swatch awaiting surgery.
 I like to pick a row a few rows up from the ribbing, so I can see better when I start cutting. I take a smaller needle than what I was originally knitting with and start weaving it through the right side of each stitch all down the row.
 There we go, all the stitches threaded on the needle.
 I choose to cut 2 rows down from the row my needle is holding. This gives me some room for error and shaky hands and helps me not accidentally cut through some of the plies being held on the needle (like I did the first time I tried this) , plus then I have a tail to work with when I am done.
 Take a deep breath, clear toddlers out of the room, and start cutting.
 After cutting, I tease the extra yarn out of the stitches left on the needle. A whole bunch of little cut pieces will rain on your carpet as you are doing this.
 And, all done. See all the stitches safely on the needle ready to start knitting again. One stitch is lost when performing this amputation, so be aware of that, when you continue knitting.
I hope that was helpful. Please let me know where I could have been clearer.
And that is my first tutorial, I feel so proud :-)
 Here lies my Gigi swatch awaiting surgery.
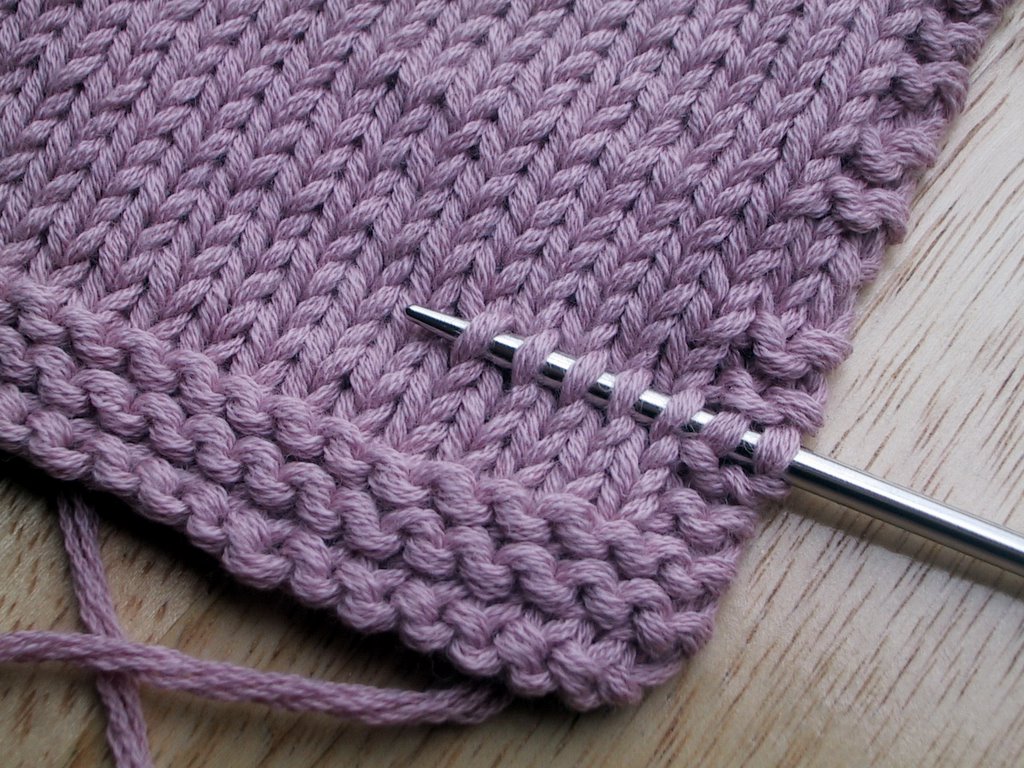 I like to pick a row a few rows up from the ribbing, so I can see better when I start cutting. I take a smaller needle than what I was originally knitting with and start weaving it through the right side of each stitch all down the row.
 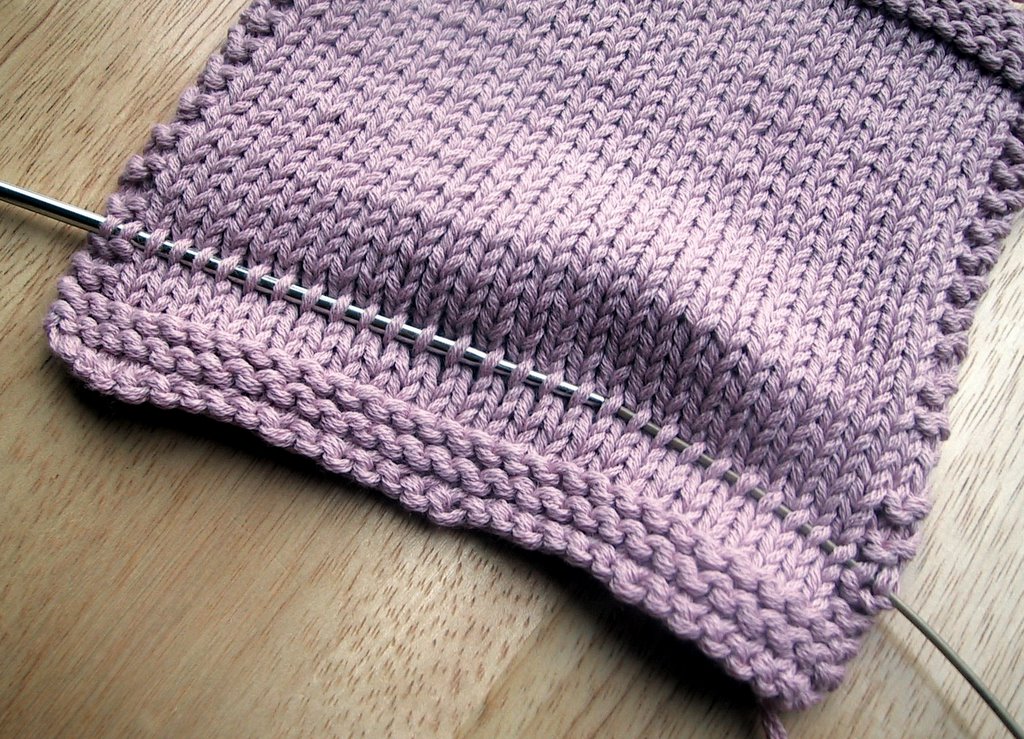 There we go, all the stitches threaded on the needle.
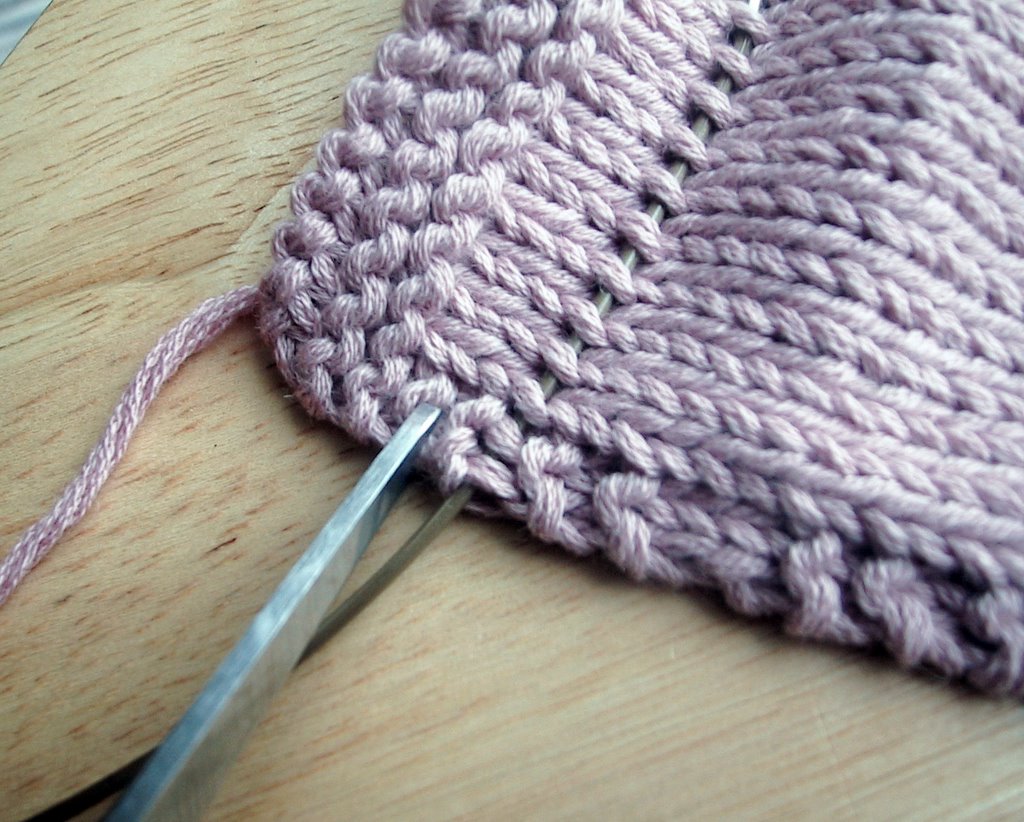 I choose to cut 2 rows down from the row my needle is holding. This gives me some room for error and shaky hands and helps me not accidentally cut through some of the plies being held on the needle (like I did the first time I tried this) , plus then I have a tail to work with when I am done.
  Take a deep breath, clear toddlers out of the room, and start cutting.
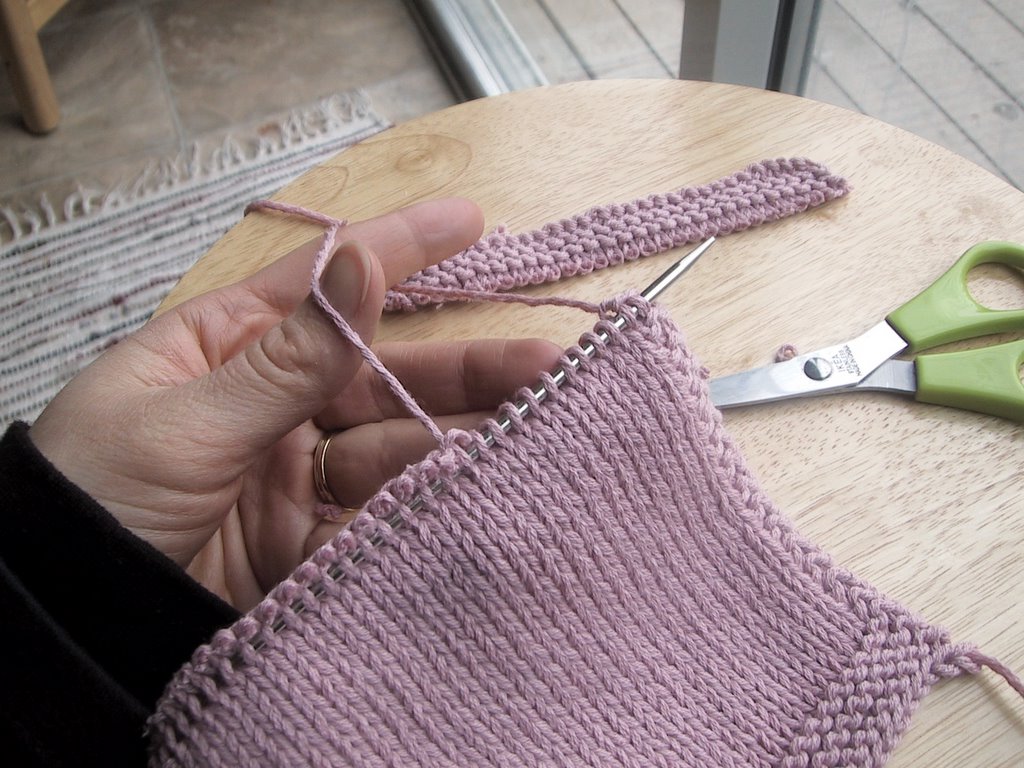 After cutting, I tease the extra yarn out of the stitches left on the needle. A whole bunch of little cut pieces will rain on your carpet as you are doing this.
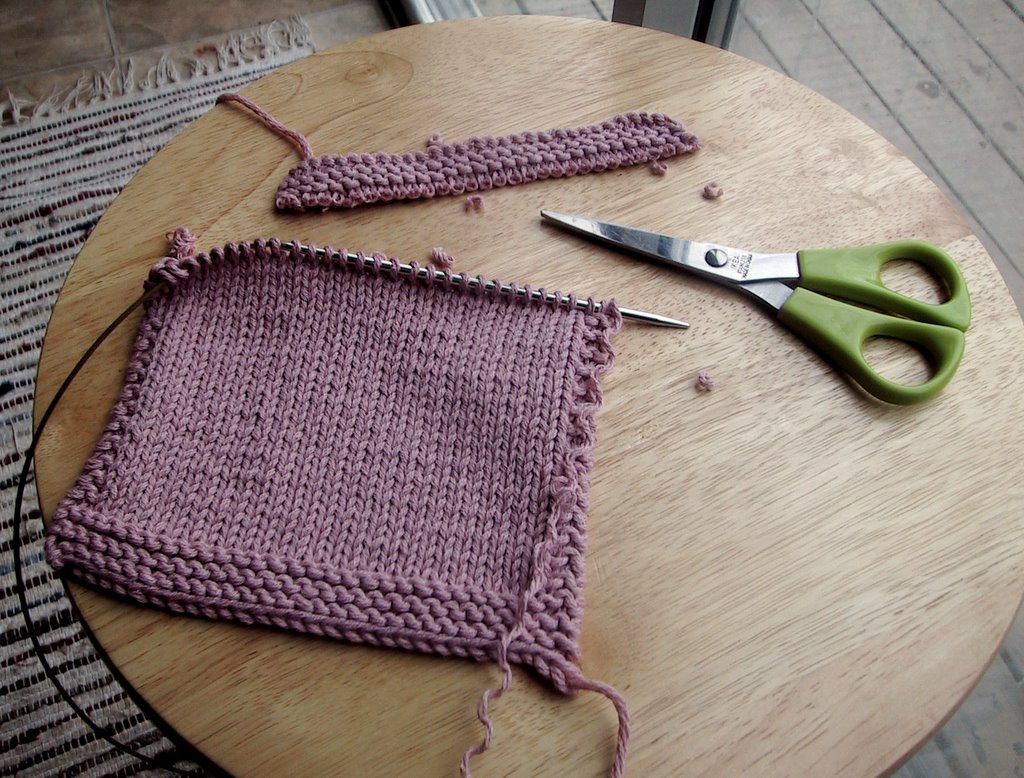 And, all done. See all the stitches safely on the needle ready to start knitting again. One stitch is lost when performing this amputation, so be aware of that, when you continue knitting.
I hope that was helpful. Please let me know where I could have been clearer.
And that is my first tutorial, I feel so proud :-)
posted by Knittypants at Tuesday, February 21, 2006
![]()
![]()

28 Comments:
wow! I'm impressed too. You should start a knitting show, you could be rich!
Thank you sister, dear, for your vote of confidence, but I have a lot and more to learn :-)
You make it look so easy! Thanks for the tutorial. I'll have to try it sometime. Now to figure out how to get the toddlers out of the room.
Thanks for the tutorial. I found it informative and entertaining. Also happened to be perfect timing since I need to do this to a sweater I'm not wearing because it's too short.
Wow, very cool. And proof you do swatches too!
Excellent!
Funny because I just had to do something similar to my sweater in progress!
Good tutorial, baby, it's nice to see all those years of private school haven't gone to waste. Thanks for not blogging our swatching fiasco.
very clear instructions, super pictures!
(and just what I need, in order to know how to extend the kid jumpers I am going to make for my ds, 2 years old)
Great information, thanks! I am going to try it on a swatch sometime soon....
Wow, that's a great tutorial. Thanks for showing us that scissors CAN be your knitting friend...
Very nice! I've linked to this in my blog post on the same topic.
Thanks!! You make it seem simple.
Holy Mother of God. You've got some balls! (And I mean that in the best possible way!)
thanks a bunch for this tutorial, I recently took scissors to my sweater in which I made the sleeves a skoosh too long and then too short! This really helped me be a little more om' scientific about it.
Thank you so much for this tutorial! I have to cut a sweater because I did not realize it was a provisional cast on edge - I have been so scared and reading this I *think* I can do it! Of course mine is with KSH and in rib so may the force be with me ;)
THANK YOU FOR THIS!
Thank u, thank u, thank u...
Areli, I'm with your sister! I was holding my breath until I saw the last picture! LOL Good Lord, you got guts, girl! It's true - you never stop learning. Thanks so much for this stunning tutorial. Jo-Anne
Wow! You did a great job, not just with the tutorial but with the removal of the unwanted part of the knitting! Very valuable information!
PS: found you at fiber chic's blog
Thank you, thank you thank you! Two years later! I will do this tomorrow. No I can sleep having read your tutorial.
WOW! that is going to be very useful. I have a few store bought sweaters. I would like if they were a bit longer. I just finished a sweater for my D.D. that would look better if it had more lenght to it too.
THANKS,THANKS, THANKS a bunch
great tutorial, I'll have to remember this trick
My sweater is totally ribbed. 4 k and 2 p...who to approximate the k and p stitches so that they aren't offset? I have done everything you suggest but they still look a tad off.
Help.
susan
OMG you're brave ! I am going to try this tonight on a vest I just completed. The ribbing is curly and lank and unattractive, so I am going to re-do, using your method. Thanks and wish me luck.
your fantastic tutorial is carrying on into the next decade - trying to turn a too short vest into a nice tunic - and now I have the guts to do it. Clearing dog out of room - worse than kids. thanks again!
I loved this tutorial!
I've just tried to learn it so many times, but I never had success with it.
A really nice tutirial. A just also want to start with knitting.
Thank you!! Excellent tutorial!
I am in middle of stranded cardigan and the ribbing is driving me mad as it curls up on my pretty color work! I don’t want to rip it out!
Here I go...
Post a Comment
<< Home